
Maintaining your Cheetah Stand C8 C10 C12: Keep Your Strobes From Slippin!
We get it, you put your gear through battle. Cheetah Stand Light Stands have become part of the gear you trust and we want to help keep that going. Maintaining your Cheetah Stand C8 C10 C12 will help keep them in optimal conditions no matter when or where you’re next gig takes you.
And just like your camera that might need a sensor cleaning or a lens getting a re-calibration check, your Cheetah Stand auto-deploying Light Stands will need some help getting back to factory condition. That’s why we’re here today to help you with maintaining your Cheetah Stand C8 C10 and C12. We’re creatives too and know the kind of beating that your light stands will encounter and sometimes they will have issues.
Let’s go over the list of problems you might encounter with maintaining your C8, C10 or C12 and we’ll show you how to get it back to factory condition! In today’s post, we’ll talk about how you can keep them tall
Your stand slowly slips down after you put weight on it.
This first can surprise you especially when you’re excited to start your session and notice it slipping slowly down after you might’ve added your Godox or Profoto strobe and large softbox, such as our Quick Series Softbox, 34" (QSB-34). The main reason for this is that we’ve probably over-loaded the stand with too much weight.
Please make sure that you’re thinking about the weight limits of each of your light stands. For the C8 it is 6lbs of static weight. The C10 is 8lbs and the C12 is 15lbs. If you start to move it with the strobe and softbox, you will reduce the integrity of the clamps. It’s best to reduce the height before moving your lightstand.
To restore the clamping force of the light stands, you should consider the following clamps that we provide depending on whether you have a C8, C10 or C12.
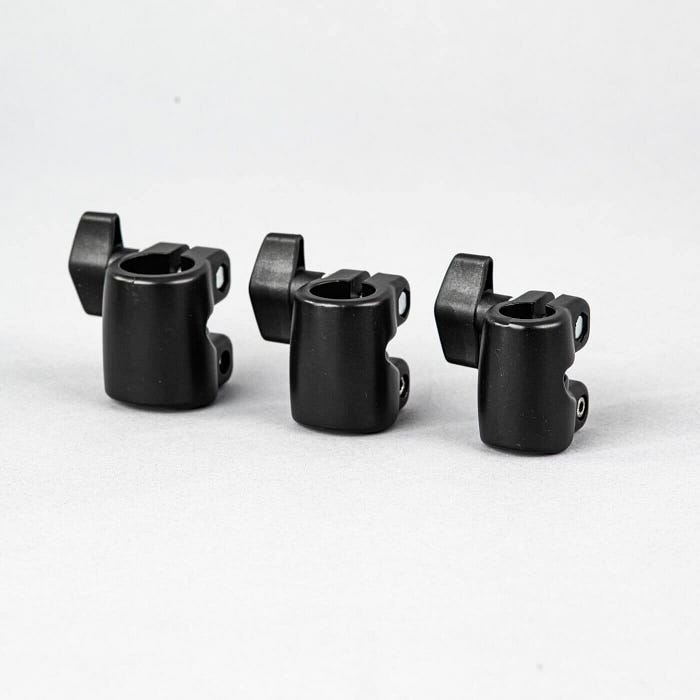
Directions for C8 and C10 Collar Replacement:
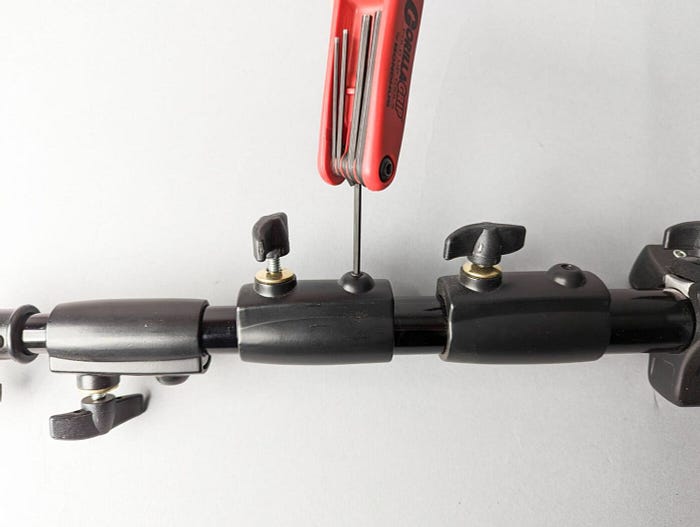
Tools Required: 6mm Allen Wrench
Directions:
1. Remove the old collars by using your un-screwing the thumb screws and then use the 6mm allen wrench to loosen all of the collars.

2. Slip all of the old collars off and simply slip on the new collars in order of largest collar to smallest collar.
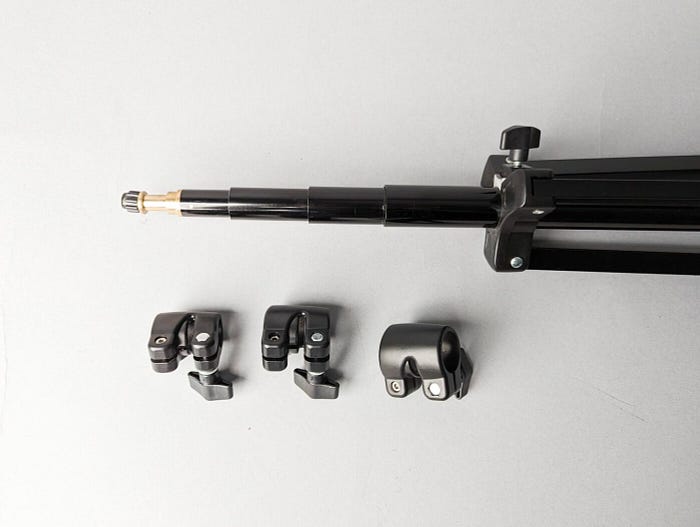
Make sure that the Thumb Screw is placed on the top side of the stand as shown below.
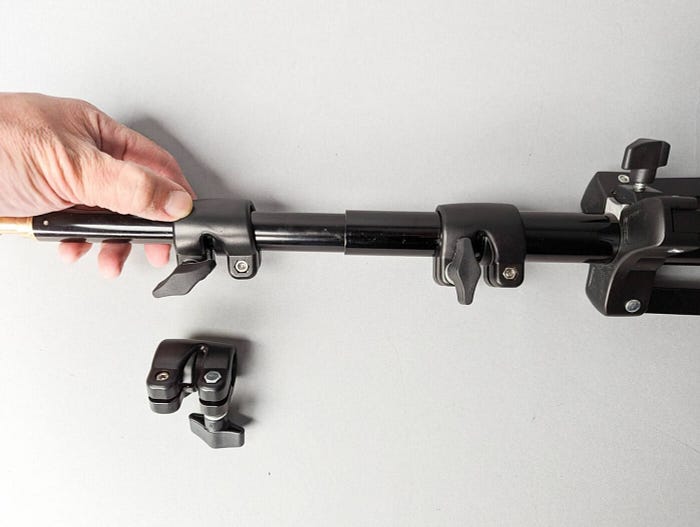
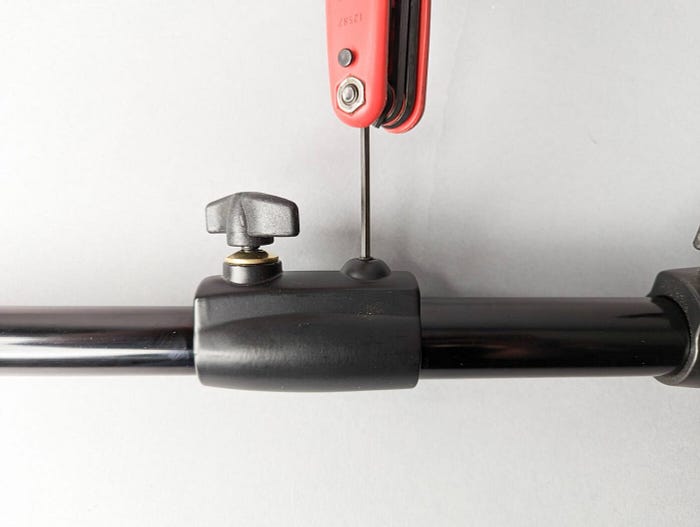
3. Now re-tighten with the 6 mm Allen Wrench for all 3 collars.

That’s it! And now after maintaining your Cheetah Stand C8 C10 is now done. If you have a C12, follow the directions below:
Directions for C12 Collar Replacement:
Maintaining your C12 Light Stand is a little different as there are more parts involved, but not difficult at all!
Tools Required: 2.5mm Allen Wrench
Directions:
1. Remove the old collars.
2. Seperate the poles and insert the upper plate. Please notice that the it is an angled plate. The shorter angle will be at the top of the pole while the taller angle sits towards the bottom of the light stand.
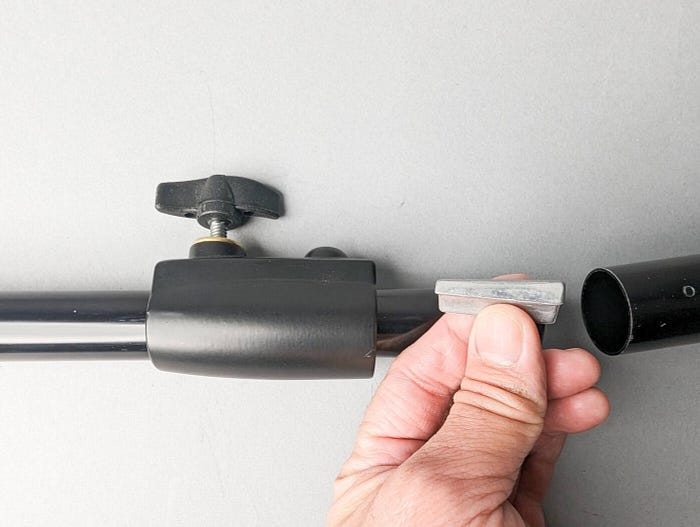
3. Slide the top plate all the way to the top of the pole inside the collar so that the thumbscrew can press down on it.

4. Insert the bottom plate and push it all the way in until the bottom is flush with the collar. This piece is flat and has no angle. Re-assemble the C12 Light Stand.
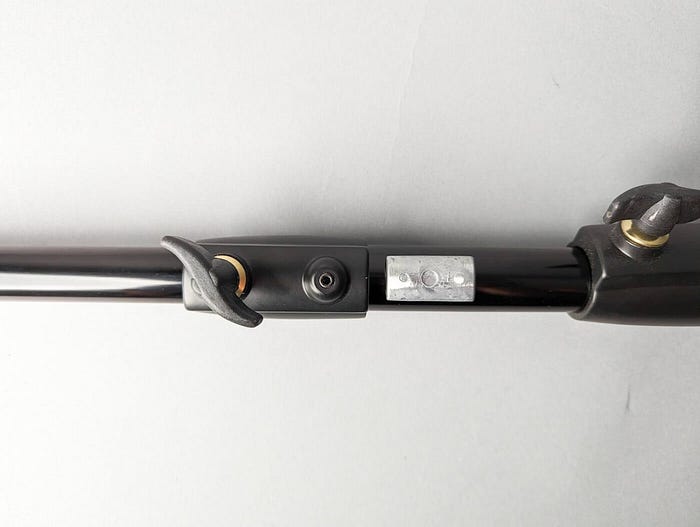
5. Re-assemble the stand as tightly so that they sit flush with the collar then use a 2.5 mm allen wrench to tighten the bottom screw.
Repeat for the middle and top collars and you are done. Your Cheetah Stand C12 will now be like new!
That’s it! You’re ready to go create again. As always, if you have any questions on how to maintain your Cheetah Stand Light Stand C8 C10 C12s, just call or email us at repair@cheetahstand.com.